VMware Cloud Foundation – Part 1: Deploying management domain with VLC
Hello readers,
In this part, we will be deploying VMware Cloud Foundation in a nested environment using vCF Lab Constructor, which you can read more about here. TLDR: it is a PowerShell script designed to automatically deploy vCF along with the management Workload Domain (WLD).
VCF Lab Constructor (aka VLC) is a great PowerShell tool created by Ben Sier and Heath Johnson working at VMware in the Technical Marketing team. A big thank you for them for making this amazing script!
Quoting from a blog post (which is how I learned about it), found here:
“It’s the easiest way to essentially deploy a Cloud Foundation nested environment, without having to manually install ESXi, Cloud Builder as well as doing lots of validation on your own.”
But what is VMware Cloud Foundation? Quoting from VMware: “VMware Cloud Foundation makes it easy to deploy and run a hybrid cloud. VMware Cloud Foundation provides integrated cloud infrastructure (compute, storage, networking, and security) and cloud management services to run enterprise applications in both private and public environments.”
The requirements for the lab, is to have a server with at least 192 GB of memory, 8 cores or more, and preferably SSDs. In the default configuration, it will deploy the following VMs:
- Cloud Builder (4 cores, 8GB RAM, 350GB disk space)
- ESX01 (8 cores, 64GB RAM, 551GB disk space)
- ESX02 (8 cores, 64GB RAM, 476GB disk space)
- ESX03 (8 cores, 64GB RAM, 476GB disk space)
- ESX04 (8 cores, 32GB RAM, 176GB disk space)
Within the ESXi hosts, the following will be deployed for the management Workload Domain:
- 2 Platform Services Controllers
- 1 vCenter
- 1 NSX Manager
- 1 SDDC Manager
- 3 NSX Controllers
- 3 vRealize Log Insight nodes (1 master, 2 workers)
What I would recommend is to enable TPS with salting, for which you can find more info in the blog post here.
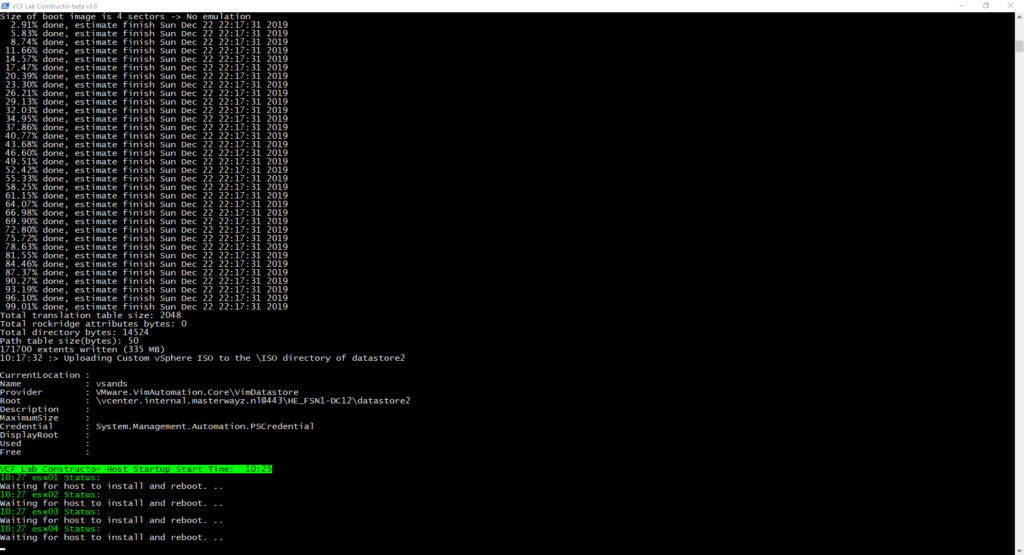
VLC comes with a guide that explains how the program works and how to use it. Here are some screenshots of my deployment:
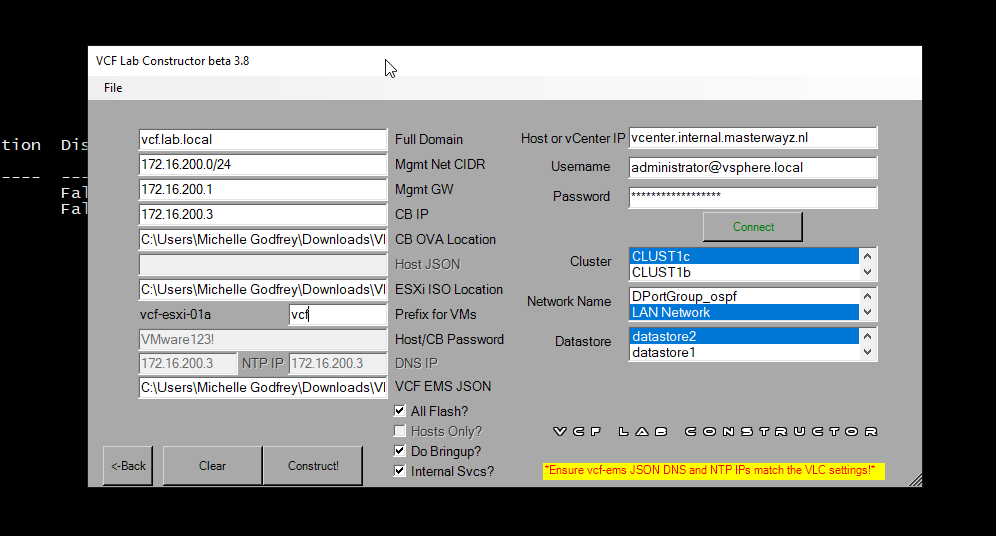

To deploy using this script, you have to choices. You can either use your own DNS and NTP server, or you let the script run DNS and NTP on the CloudBuilder virtual machine. You do this my checking the “internal svcs” checkbox, which will install and configure maradns on the CloudBuilder virtual machine.
Some things to note before deployment: it will take a few hours. Especially on older hardware or HDDs. Also note that you can only access the Cloud Builder through its IP address and not through the hostname. Plus that if you want to see the deployment status from the Cloud Builder, and if you have selected that the script does the bring-up, you will need to upload a bogus JSON file (such as the one used for the script), followed by cancelling and then going to https://cloudbuilder-ip/bringup-result
Another thing to note: when deploying the using the script, be sure to use a ESXi version that is compatible with your Cloud Builder version! For Cloud Builder 2.1.0.0, this is ESXi 6.7 13981272. If you do not do this, you may get weird errors with vSAN or other weird issues. The correct ESXi ISO is located on the Cloud Builder itself, at:
/mnt/iso/sddc-foundation-bundle-xxxx/esx_iso
Have fun deploying VMware Cloud Foundation! In the upcoming parts I will be upgrading, adding workload domains and more!
Have a great day and see you in the next post.